
Packing turns picked units into a parcel with a label on it.
The pack queue
Section titled “The pack queue”Open Tasks → Pack. Every task here was created by a completed pick.
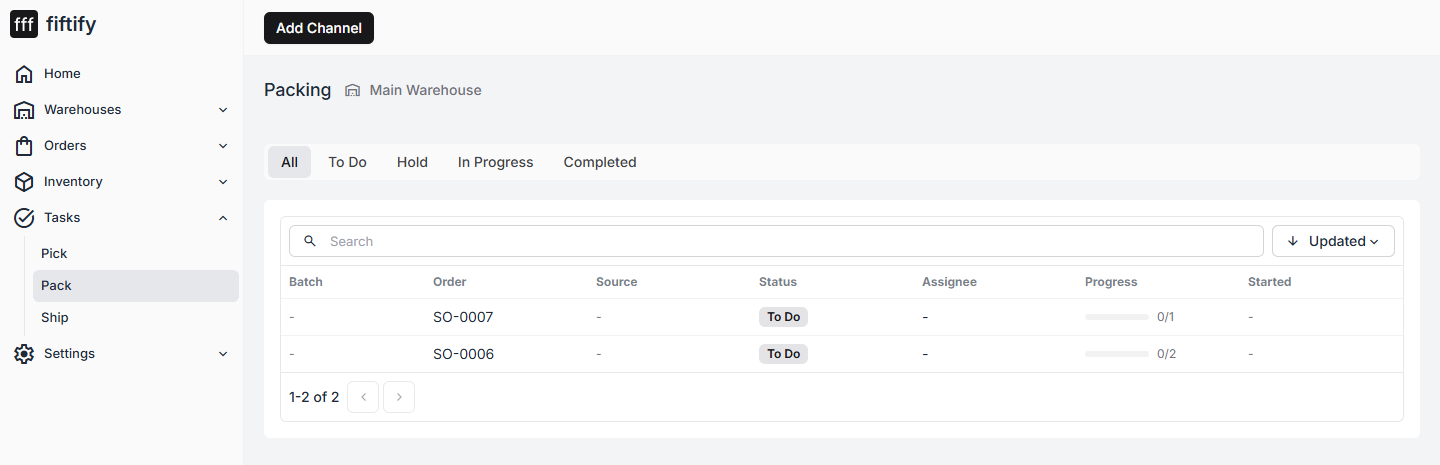
Source is where the picked goods are waiting — the tote, station, or With Packer if the picker carried them over.
The pack screen
Section titled “The pack screen”Select a row to open it.
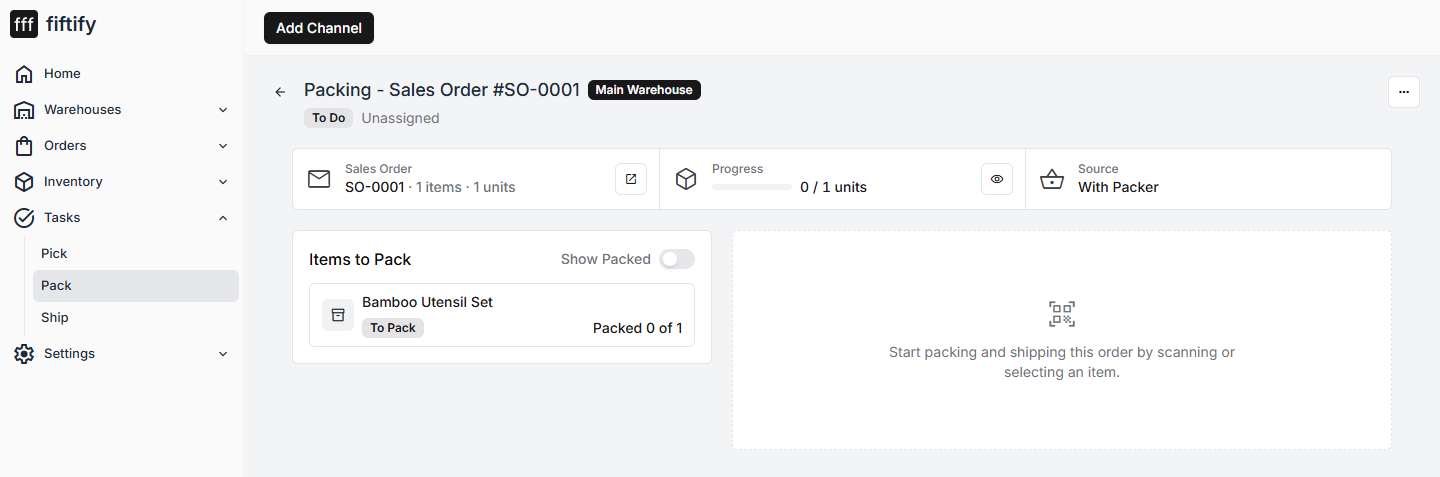
The left column lists Items to Pack; the right side is where the parcel is built. The header cards repeat the order, the progress in units, and the source.
Pack the items
Section titled “Pack the items”Select an item — or scan it — to record it into a package.
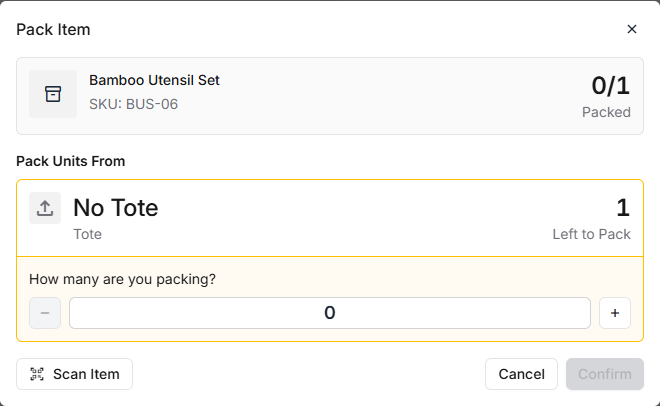
Set the quantity and confirm. The item moves out of Items to Pack and into the package on the right.
Build the package
Section titled “Build the package”Once something is packed, the parcel takes shape.
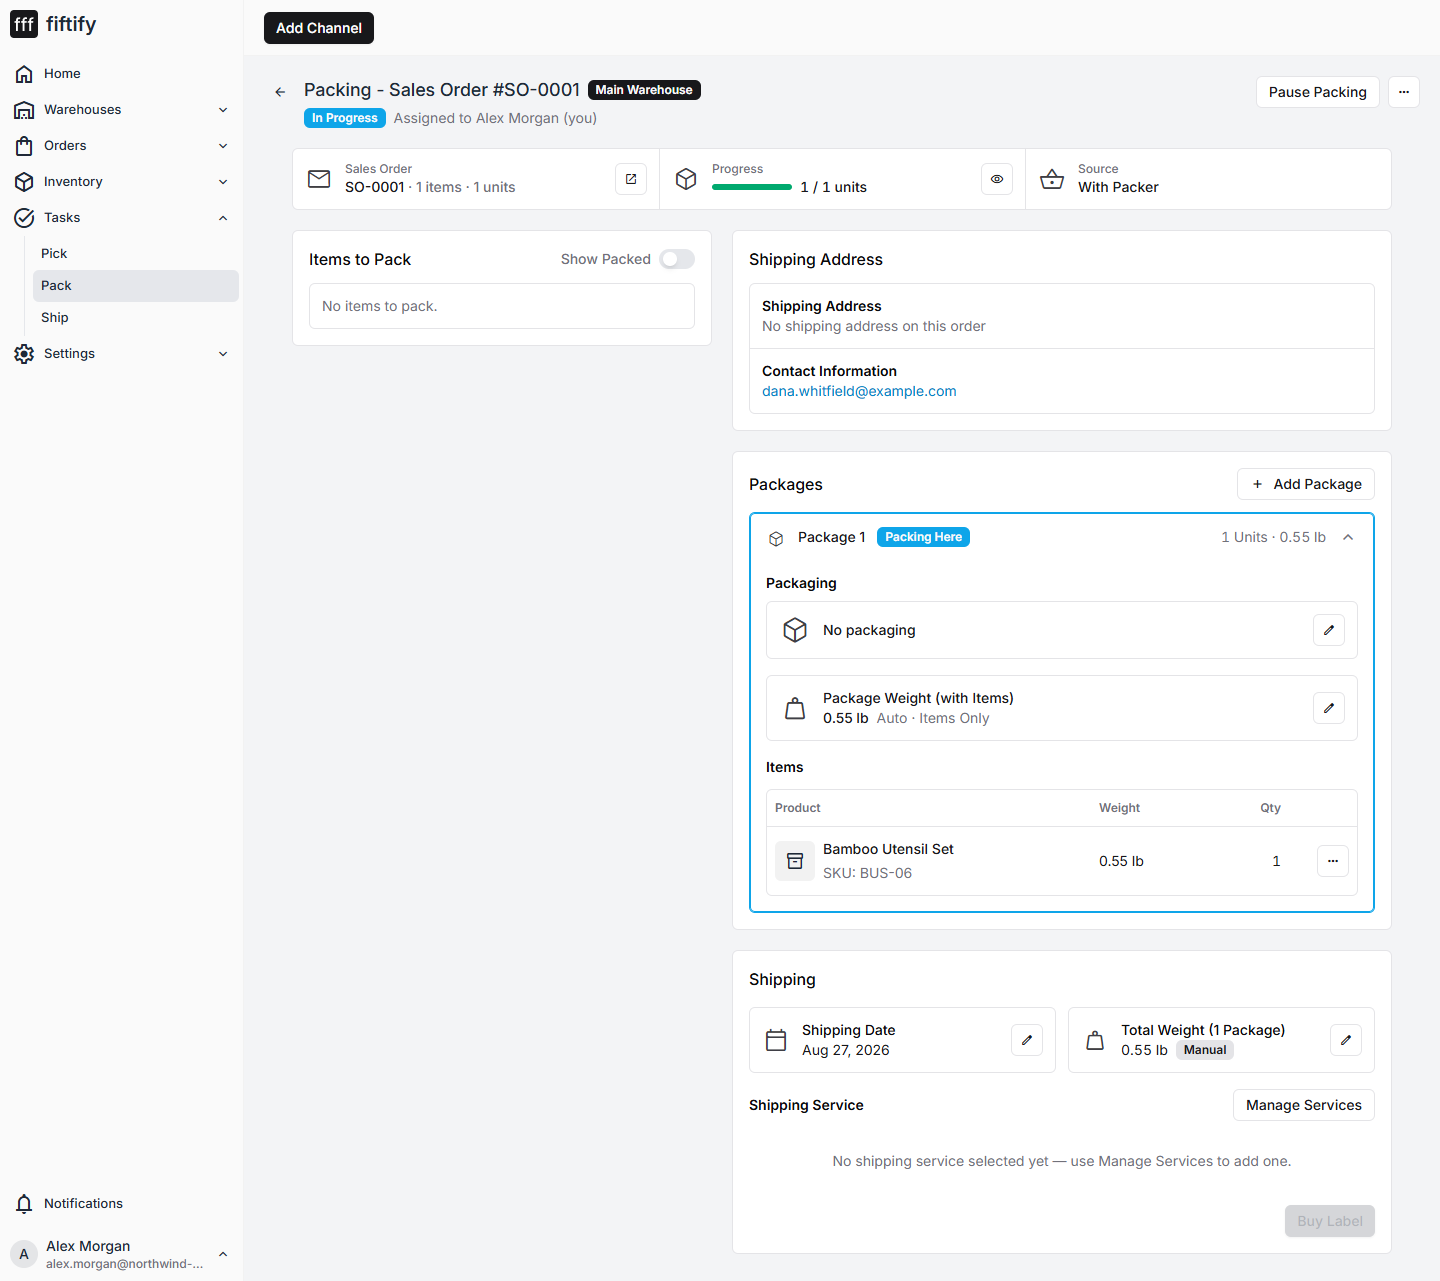
- Packages — one card per parcel. Add Package splits an order across several boxes; each package keeps its own items and weight.
- Packaging — which box or envelope you used, from your packaging settings.
- Package Weight (with Items) — calculated from the items automatically. The Auto · Items Only label means nothing has been overridden; the pencil sets it by hand when your scale disagrees.
- Shipping Address and Contact Information — pulled from the order.
- Shipping — the shipping date, the total weight across packages, and the Shipping Service.
Buy the label
Section titled “Buy the label”Buy Label stays disabled until the parcel has everything a carrier needs: a shipping address on the order and a shipping service selected. If no service is offered, Manage Services is where they are configured.
Buying or printing the label completes the pack and creates the ship task for the order.
Next: shipping an order.
The boxes a packer chooses from are defined under package types and enabled per warehouse; carriers and the non-carrier delivery methods are set up in carriers and delivery methods.