
Warehouse settings
Published
Each warehouse has its own settings page under Settings → Warehouses, with five tabs. Almost everything here is a per-building answer to a question the company as a whole cannot answer for you.
Details
Section titled “Details”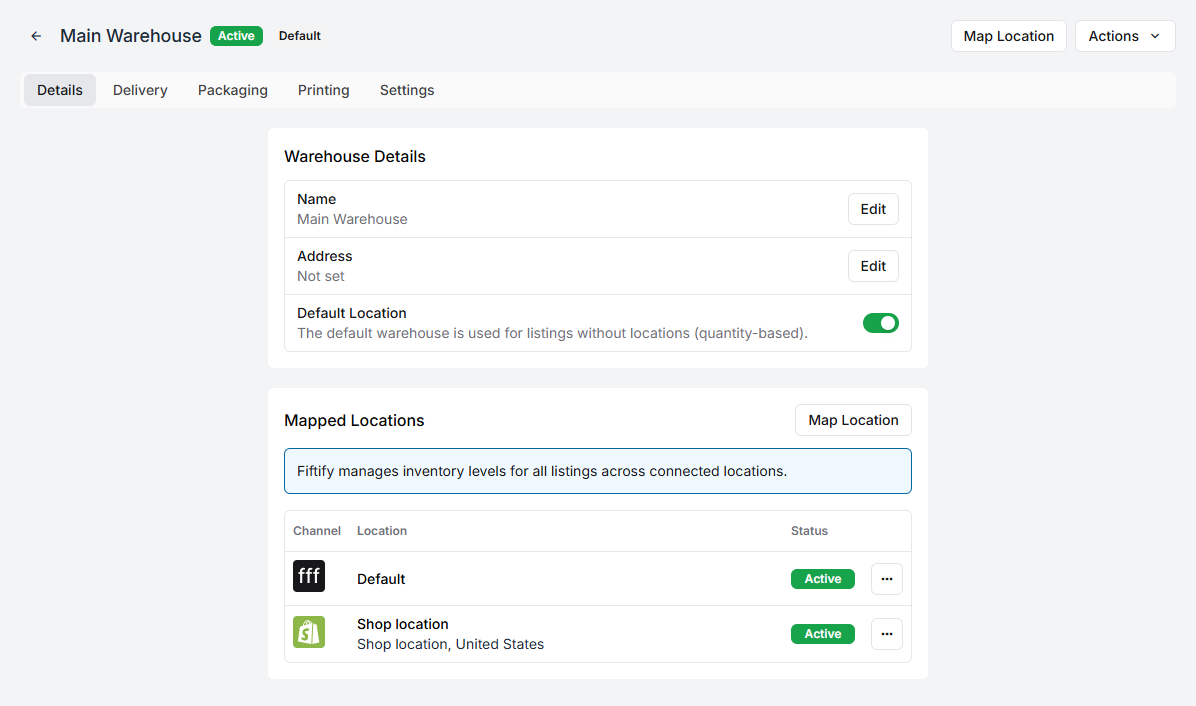
Name and Address identify the building. The address prints on documents and is what a carrier rates a shipment from, so a rough one produces rough quotes.
Default location is the fallback:
The default warehouse is used for listings without locations (quantity-based).
One warehouse in your company is the default, marked with a Default badge. It is where a listing with no location of its own is assumed to sit.
Mapped locations lists the channel locations pointing at this warehouse.
Fiftify manages inventory levels for all listings across connected locations.
Map Location attaches another one. This is the step that makes inventory sync work at all — a channel location that points at no warehouse is a location Fiftify will not sync. See channel settings and locations.
Delivery
Section titled “Delivery”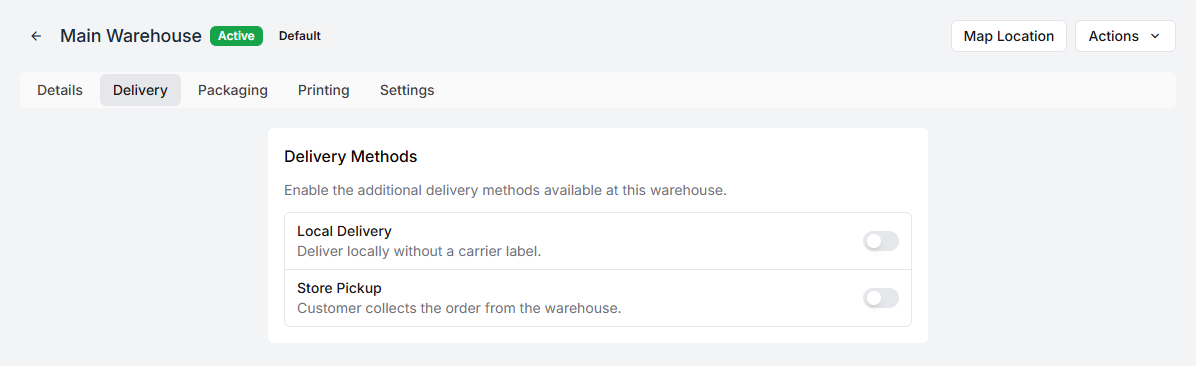
Enable the additional delivery methods available at this warehouse.
Local Delivery and Store Pickup, each on or off for this building. Shipping with a carrier is always available; these two are the ways of getting an order out without one.
They are per warehouse because buildings differ. A shop can hand an order over the counter; a fulfilment centre on an industrial estate cannot. See carriers and delivery methods.
Packaging
Section titled “Packaging”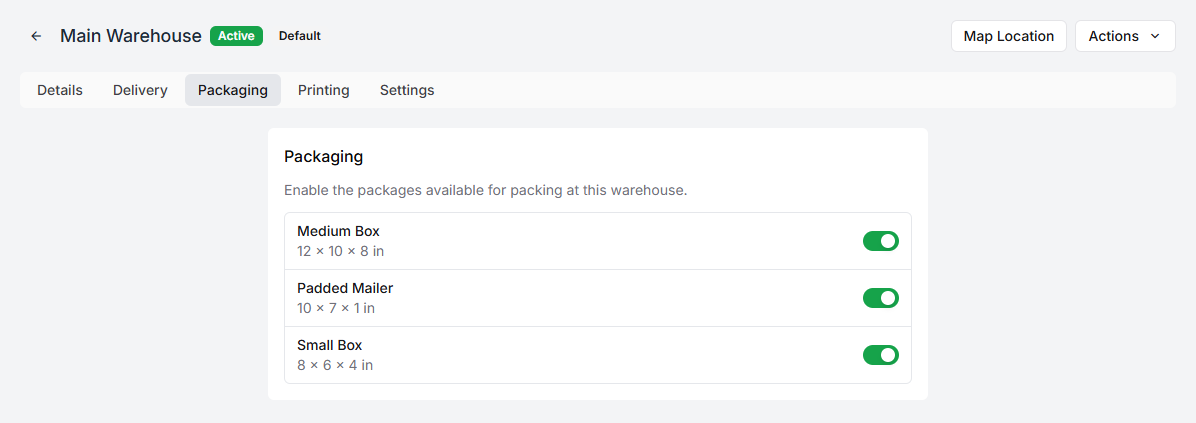
Enable the packages available for packing at this warehouse.
Every package type your company has defined is listed, and each is switched on or off here. A warehouse that does not stock padded mailers should not offer one to its packers.
Package types themselves are created company-wide — see package types.
Printing
Section titled “Printing”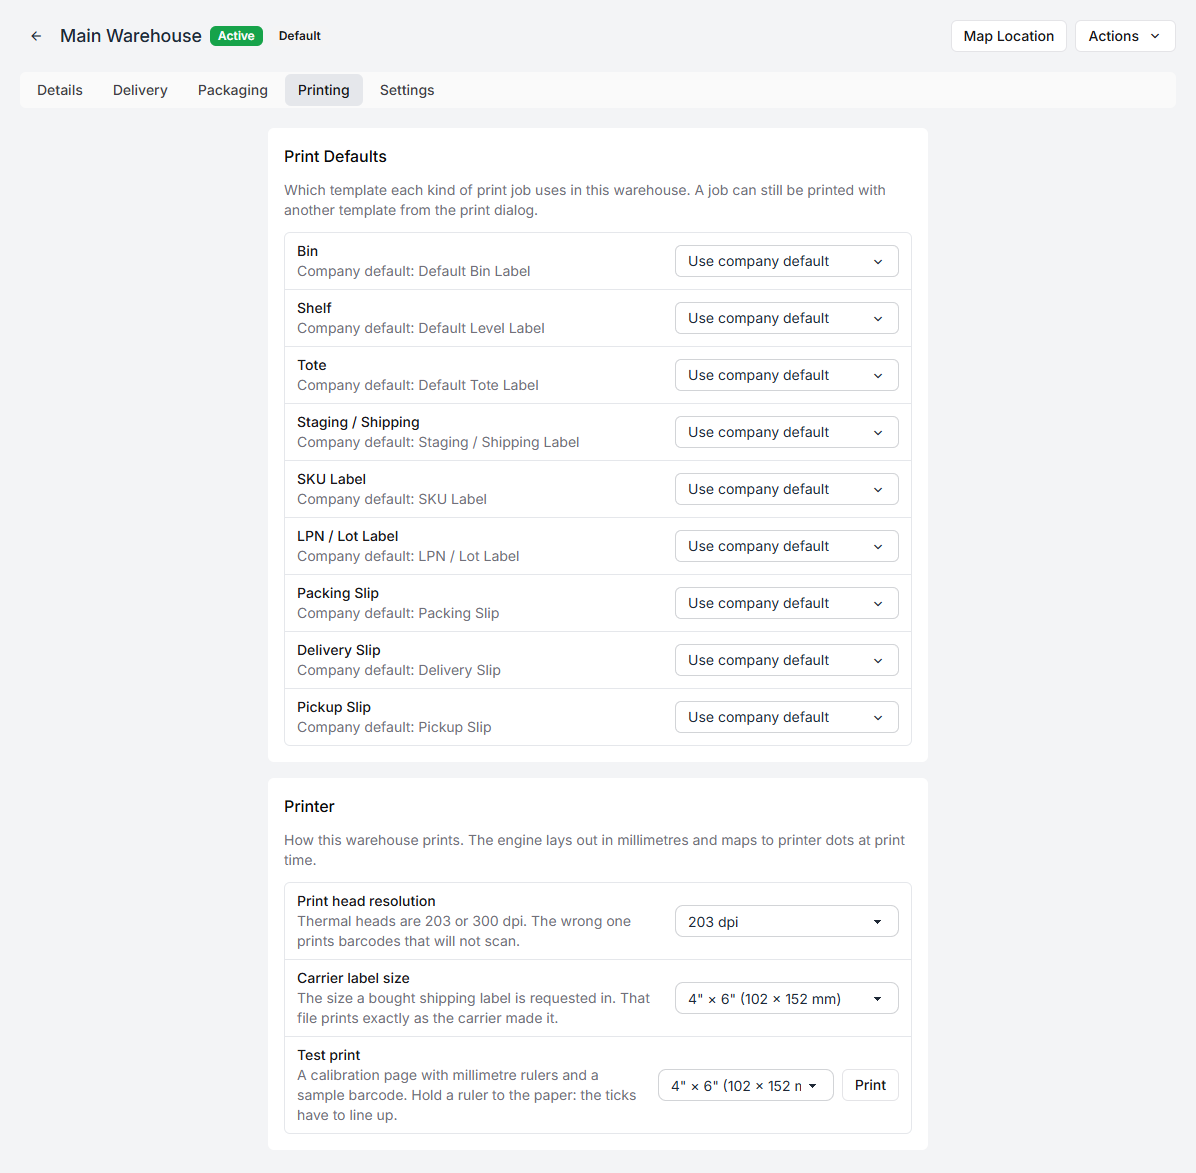
Two things live here.
Print defaults — which template each kind of print job uses in this warehouse. Every job starts on Use company default, with the company’s choice named beside it. Override only what this building does differently.
A job can still be printed with another template from the print dialog.
Printer — the two settings that decide whether the paper is usable: print head resolution (203 or 300 dpi) and carrier label size. Both are properties of the hardware in this building, which is exactly why they are not a company setting. The Test print at the bottom is how you check. See print templates and labels.
Settings
Section titled “Settings”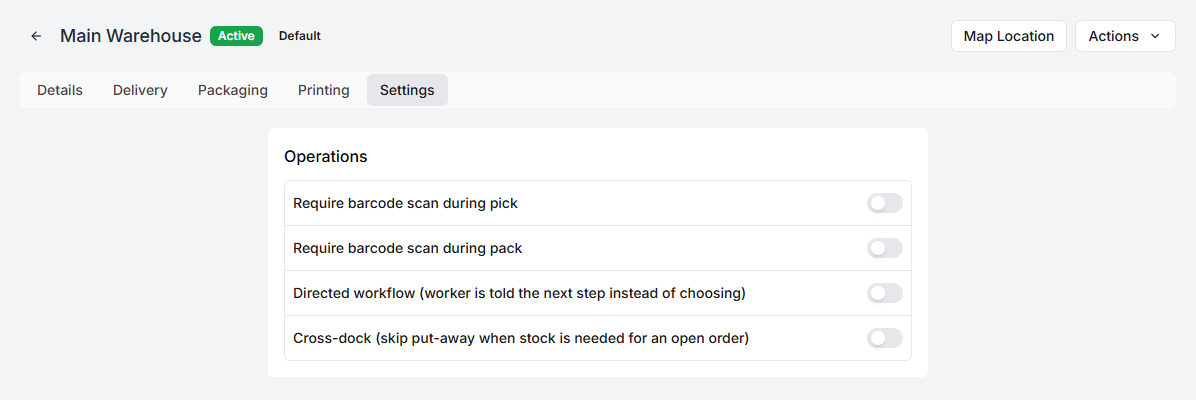
Four switches that change how work is done on this floor:
Require barcode scan during pick — a picker must scan the item rather than confirm it by eye. Slower per line, and it catches the mis-pick that would otherwise be found by a customer.
Require barcode scan during pack — the same check at the bench, against what the order says.
Directed workflow — the worker is told the next step instead of choosing. With it on, someone opens the app and is handed work; with it off, they pick from a queue. Directed suits large teams and new staff; choosing suits small teams who know the building.
Cross-dock — skip put-away when stock is needed for an open order. Arriving goods that an open order is waiting on go straight into picking rather than onto a shelf and back off it. It saves two handling steps on a backorder, and it means the stock never appears in a bin. See receiving stock.
Company-wide warehouse settings
Section titled “Company-wide warehouse settings”One screen sits above the individual warehouses, at Settings → Warehouses → Settings.
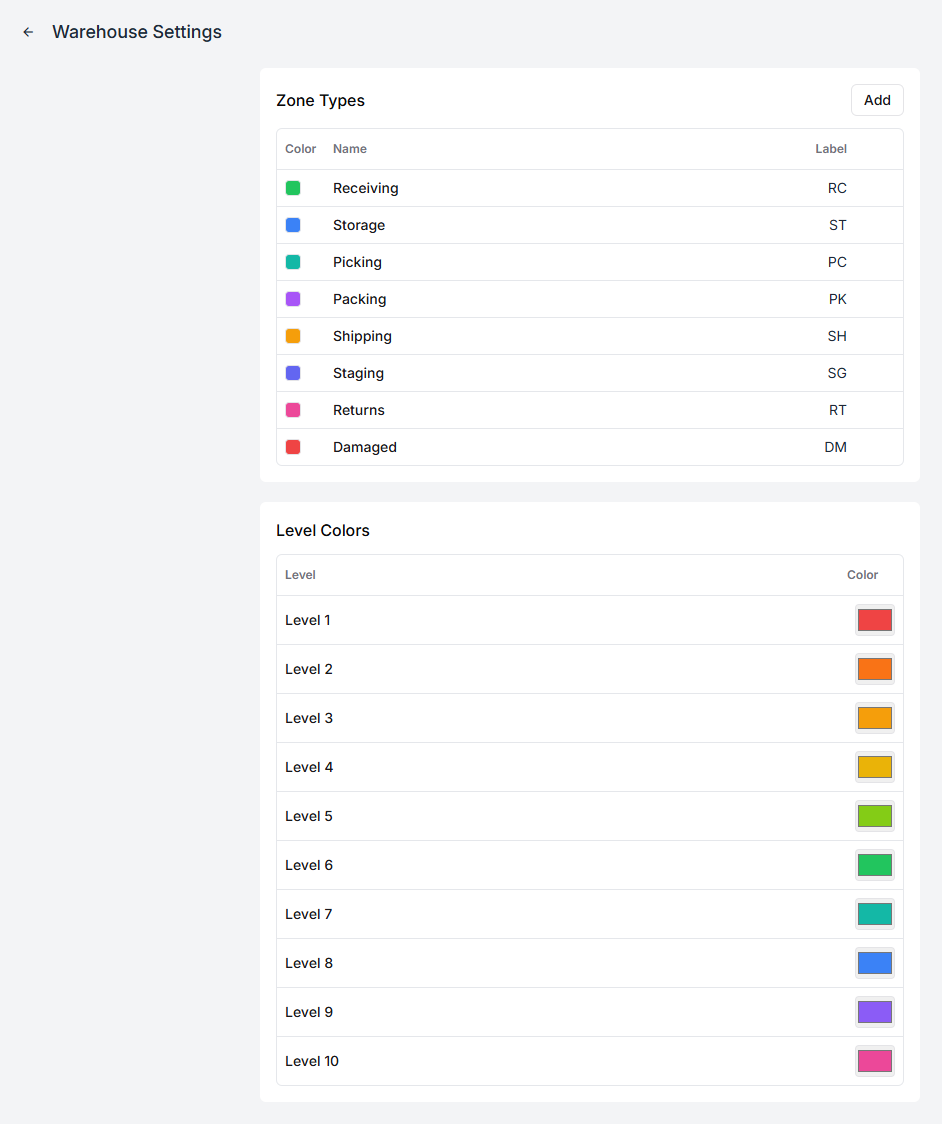
Zone types — the kinds of area a layout can contain, each with a colour and a short label: Receiving (RC), Storage (ST), Picking (PC), Packing (PK), Shipping (SH), Staging (SG), Returns (RT), Damaged (DM). You can add your own.
Level colours — the colour used for each rack level, one through ten.
Both are shared by every warehouse so that a Storage zone looks the same in all of them, and a supervisor moving between buildings reads the same map. They are what designing your layout draws with.