
Print templates and labels
Published
Everything Fiftify puts on paper comes from a template: bin labels on the shelf edge, the SKU label on a carton, the packing slip in the box. Settings → Print Templates lists them.
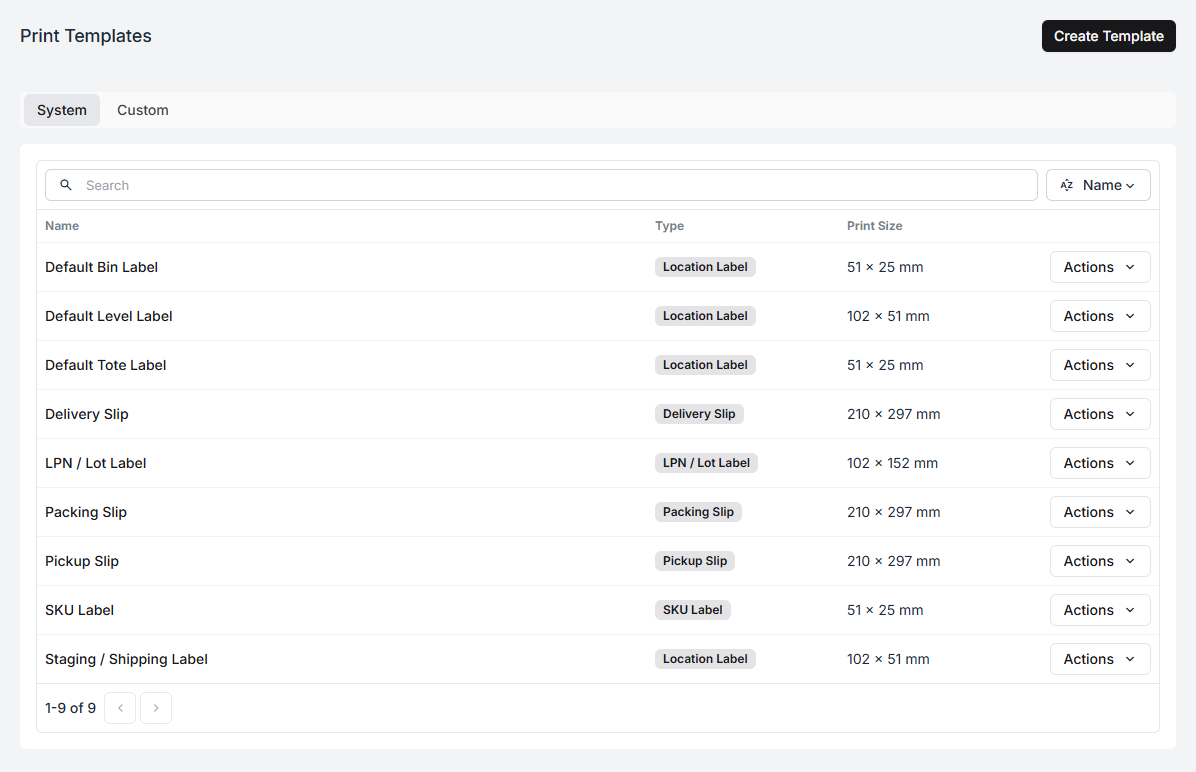
What ships with Fiftify
Section titled “What ships with Fiftify”Nine system templates cover the jobs a warehouse actually prints:
| Template | Print type | Size | What it is for |
|---|---|---|---|
| Default Bin Label | Location Label | 51 × 25 mm | The label on a bin’s shelf edge |
| Default Level Label | Location Label | 102 × 51 mm | A rack beam or level strip |
| Default Tote Label | Location Label | 51 × 25 mm | Totes |
| Staging / Shipping Label | Location Label | 102 × 51 mm | Staging and outbound spots |
| SKU Label | SKU Label | 51 × 25 mm | A product’s own barcode |
| LPN / Lot Label | LPN / Lot Label | 102 × 152 mm | A pallet or a lot |
| Packing Slip | Packing Slip | 210 × 297 mm | Goes in the box |
| Delivery Slip | Delivery Slip | 210 × 297 mm | Local delivery |
| Pickup Slip | Pickup Slip | 210 × 297 mm | Store pickup |
The System and Custom tabs separate what came with Fiftify from what you have built.
The editor
Section titled “The editor”Open a template to see it laid out.
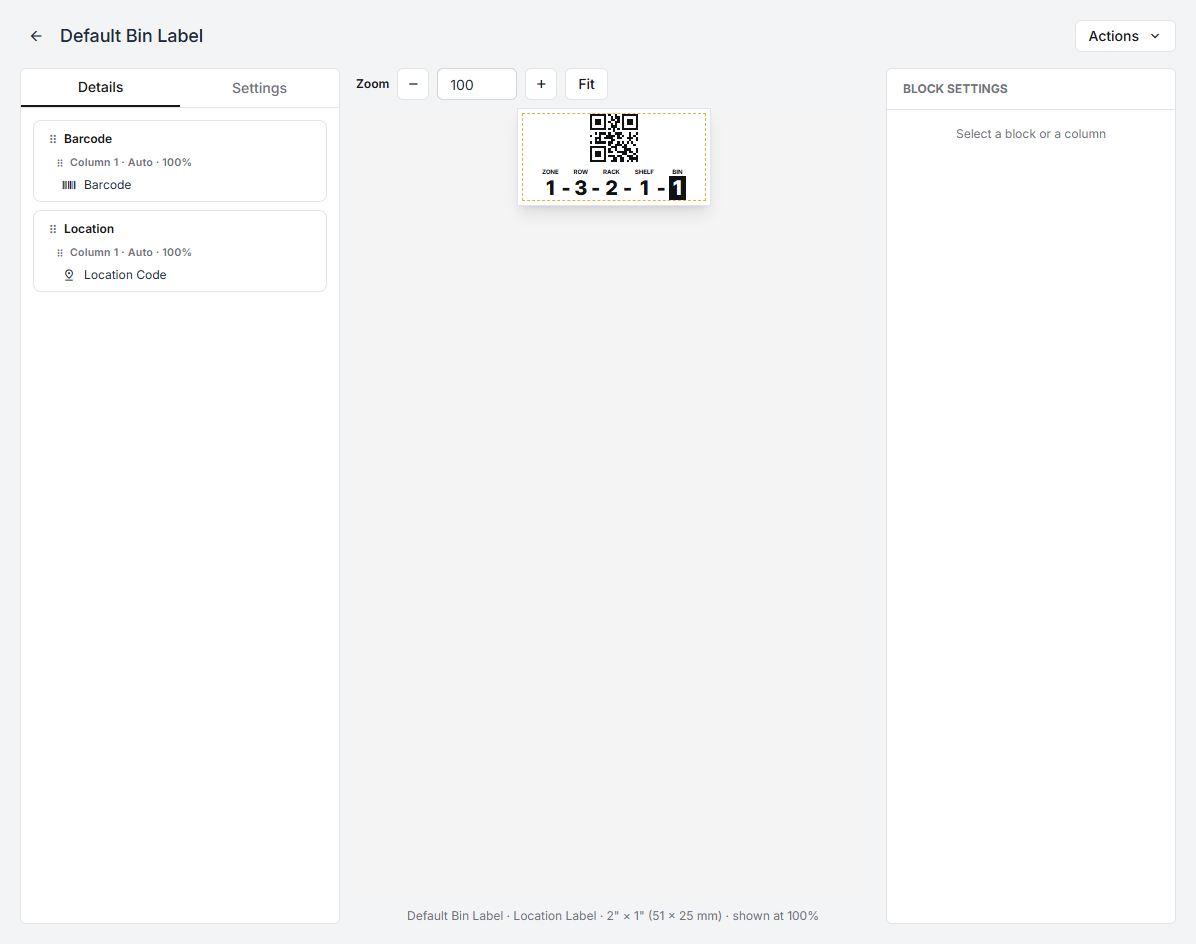
A template is a stack of sections; each section holds columns; each column holds blocks. A block is one piece of content — a barcode, a location code, a line of text, an image. Drag them into the order you want; the preview on the right redraws as you go, at the template’s real size.
Selecting a block opens Block settings on the right, where its own options live. Selecting nothing shows the prompt: Select a block or a column.
The Settings tab of a template holds the whole sheet’s properties: name, print size, margins, the gap between sections, and the default gap between the columns of a newly added section.
Print type is fixed
Section titled “Print type is fixed”One field on that tab cannot be changed after the template is created:
Set when the template is created and fixed afterwards — it defines the data blocks can bind to. Duplicate the template to build one for another type.
That is the reason a bin label cannot become a packing slip: the blocks bind to location data, and an order has none of it. Building for a different job means starting a template of that type.
Print size
Section titled “Print size”Choose from the standard label and paper sizes — from 38 × 25 mm up to A4 and US Letter — or Custom for a stock nobody else uses. Sizes are shown in both inches and millimetres because label stock is sold in one and measured in the other.
Making your own
Section titled “Making your own”System templates are read-only. To get an editable one, duplicate the closest system template from its Actions menu and edit the copy. Your version then appears on the Custom tab.
Which template each job uses
Section titled “Which template each job uses”A company-wide default is set per print job, and each warehouse can override it under Settings → Warehouses → (warehouse) → Printing.
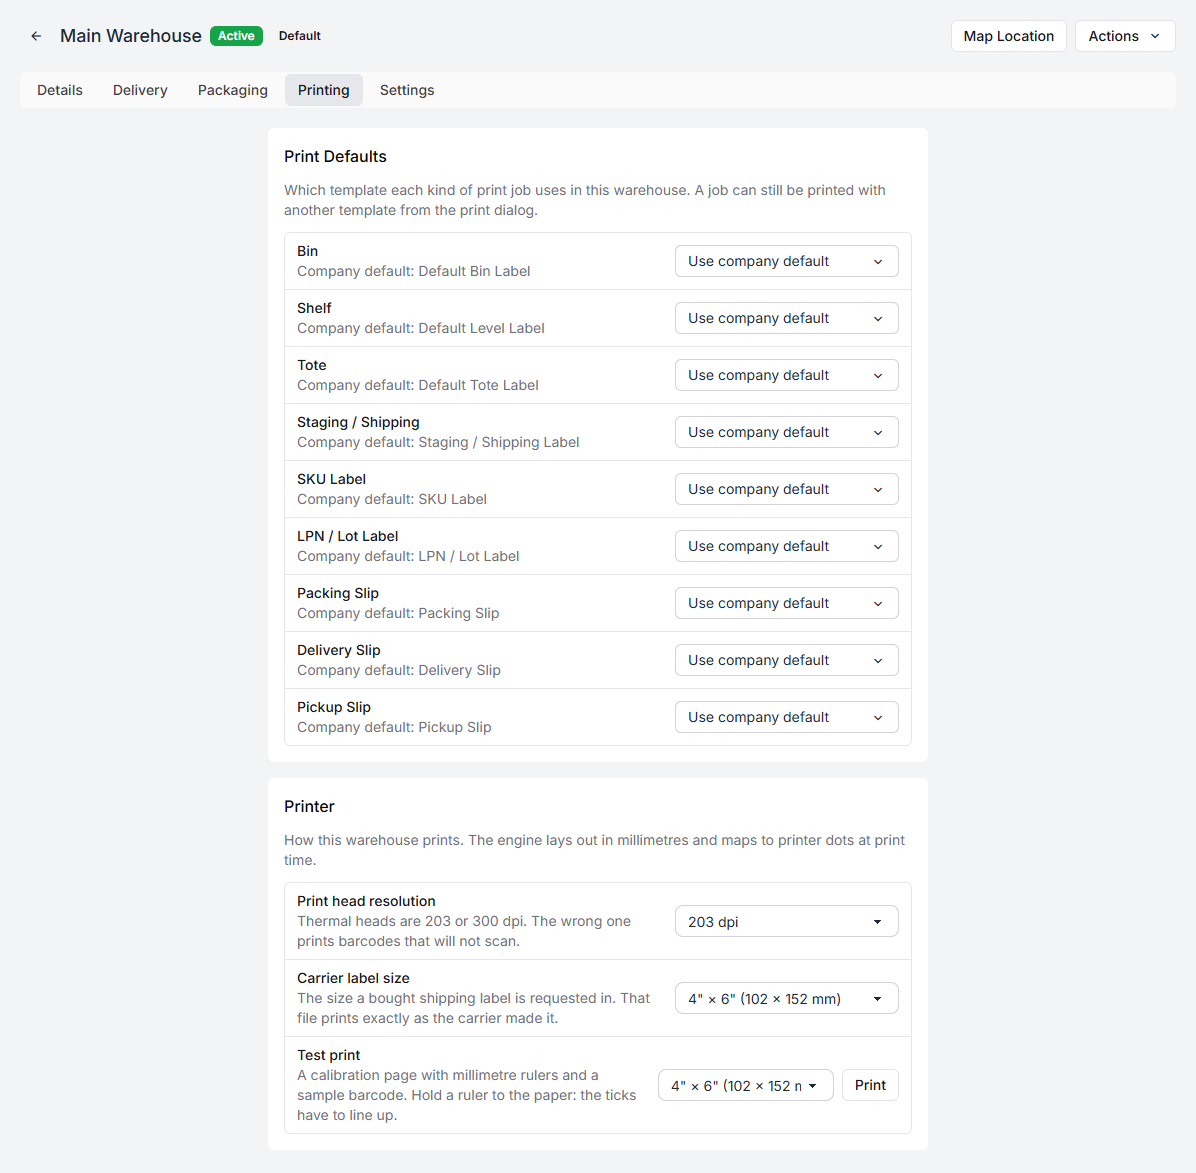
Every job — Bin, Shelf, Tote, Staging / Shipping, SKU Label, LPN / Lot Label, Packing Slip, Delivery Slip, Pickup Slip — starts on Use company default, and the company default is named next to it so you can see what you are overriding.
A job can still be printed with another template from the print dialog.
So the default is the answer to “what usually happens”, not a restriction.
The two printer settings that matter
Section titled “The two printer settings that matter”Below the defaults sit two settings that decide whether the paper coming out is usable at all.
Print head resolution — thermal printers are either 203 or 300 dpi:
The wrong one prints barcodes that will not scan.
That is not a warning about quality. A barcode laid out for 300 dpi and printed at 203 comes out with bars the wrong width, and a scanner reads nothing. Check the printer’s own label or its spec sheet, and set this before printing a run of bin labels you will have to peel off again.
Carrier label size — 4” × 6” or US Letter. This is the size a bought shipping label is requested in; that file then prints exactly as the carrier made it.
Test print
Section titled “Test print”The Test print control at the bottom sends a calibration page in whichever size you choose:
A calibration page with millimetre rulers and a sample barcode. Hold a ruler to the paper: the ticks have to line up.
If they do not, the layout is being scaled somewhere between Fiftify and the printer, and every label from that printer will be wrong by the same amount. It is worth doing once per printer, and again after anyone changes a driver setting.